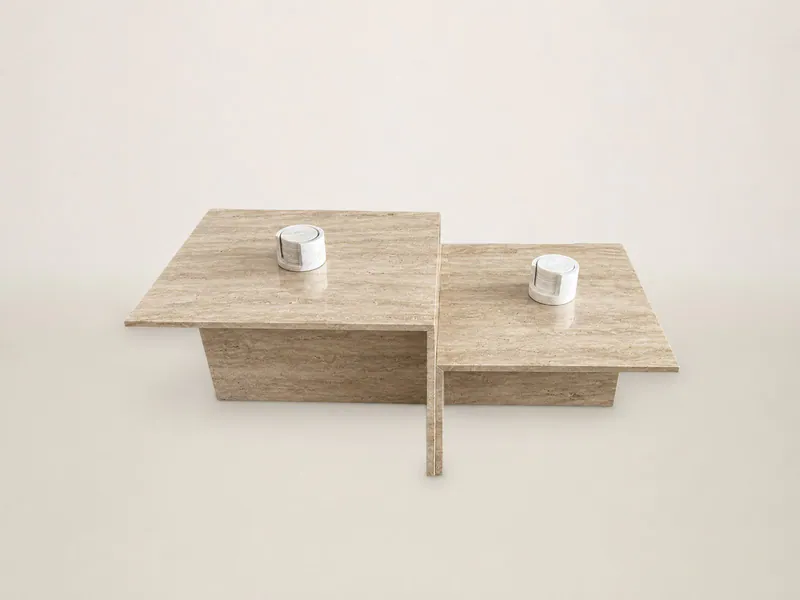
- Dimension drawing
Stepped Modular Coffee Table
Product Code BM-OS-11
Easy Assembly
- ≈ 15 min
- 2 people
- Phillips screwdriver
Arrives flat-packed; no fitter needed. Screws go into steel inserts, never into the stone.
Description
The Stepped Modular Coffee Table is a marble coffee table set of two modules, one high and one low. The low module sits beside the high one to form a stepped surface, and the two can also be used separately. The 2 cm natural stone slabs meet at 45° miters, so the stone carries on around the corners.
The set measures 128.2 × 65 × 47 cm; the high module is 70 × 65 × 47 cm and the low one 55 × 65 × 37 cm. Two models are available: sharp corner and rounded corner (R200). Stone options are Light Travertine, Narcisse, Nero Marquina and Rosso Levanto. It ships knocked down in a wooden crate and takes two people about 15 minutes to assemble. Send us your drawing for a custom size.
Specifications
- Product Code
- BM-OS-11
- Dimensions
- Set 50.5 × 25.6 × 18.5 in
- Stone
- Light Travertine
- Model
- Sharp corner
- Net Weight (stone)
- 213.8 lb
- Delivery
- Flat-packed, in a wooden crate
- Assembly
- ≈ 15 min · 2 people · Phillips screwdriver
Easy Assembly
Your coffee table arrives in parts, in a wooden crate. No fitter needed: two people and a Phillips screwdriver put it together in about 15 minutes. The screws go into steel inserts set in the stone at our workshop, not into the stone itself.
- ≈ 15 min
- 2 people
- Phillips screwdriver
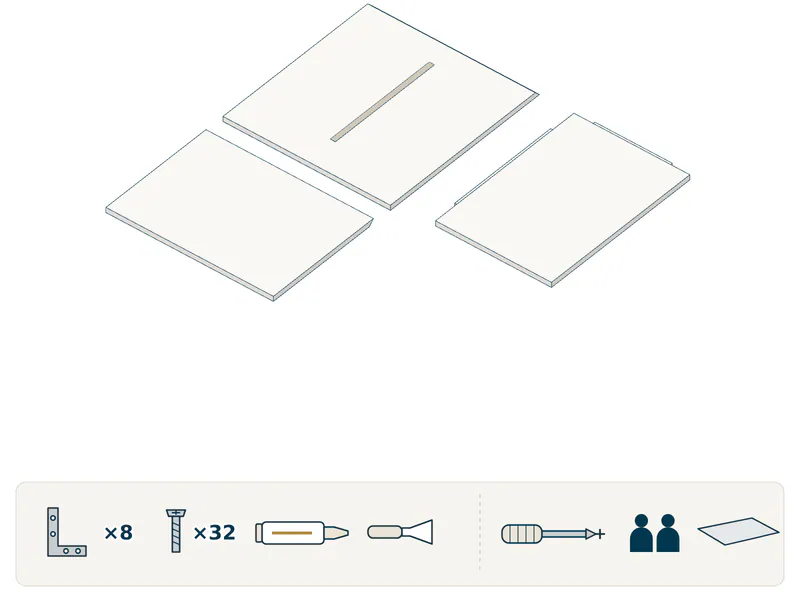
Step 1What’s in the box
The crate holds two modules, each with a top, a side panel and a spine. In the bag: 8 brackets, 32 screws, neutral silicone and a spatula (4 brackets and 16 screws per module). You provide: a Phillips screwdriver, a soft blanket and a helper. The heaviest part is about 25 kg.
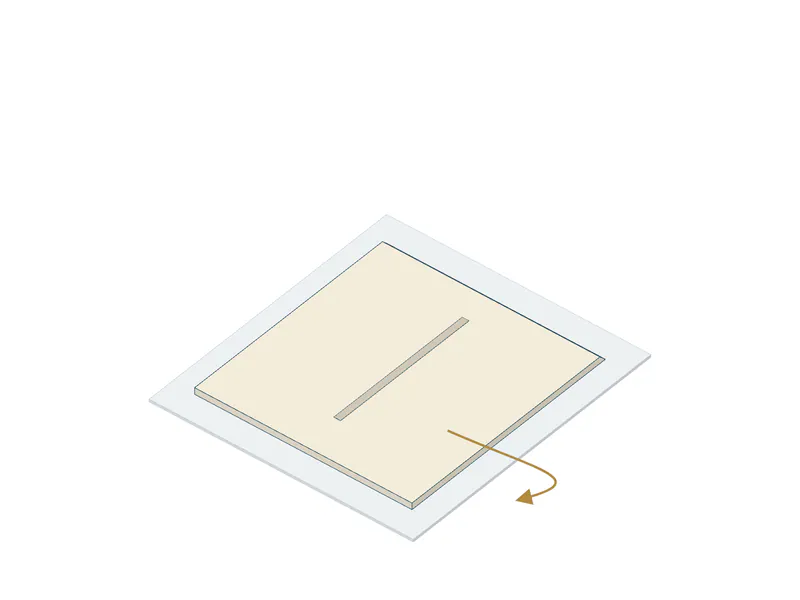
Step 2Lay the top face down
Spread the blanket on the floor and lay the top on it, polished face down.
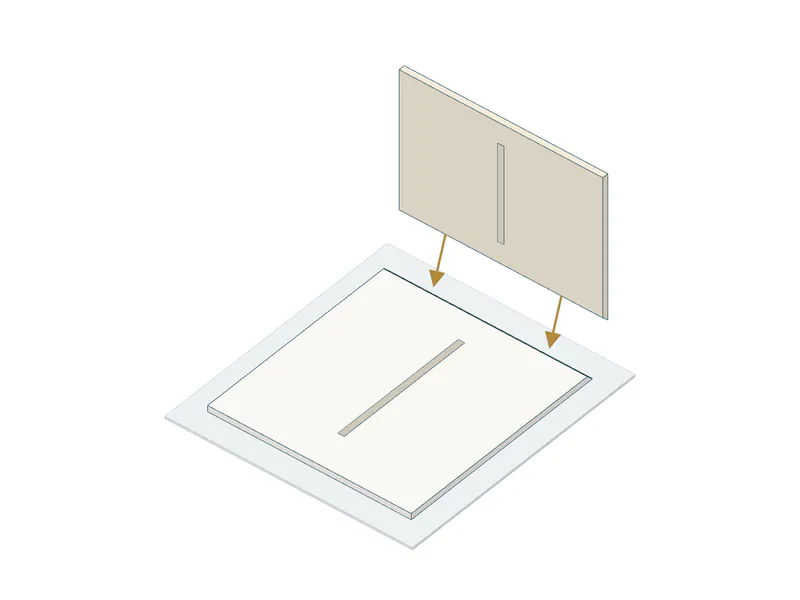
Step 3Fit the side panel
Stand the panel upright on the top’s 45° edge so the two edges meet exactly. If you like, run a thin bead of silicone along the 45° edge; wipe off any excess with a damp cloth before it dries.
Step 4Silicone in the grooves
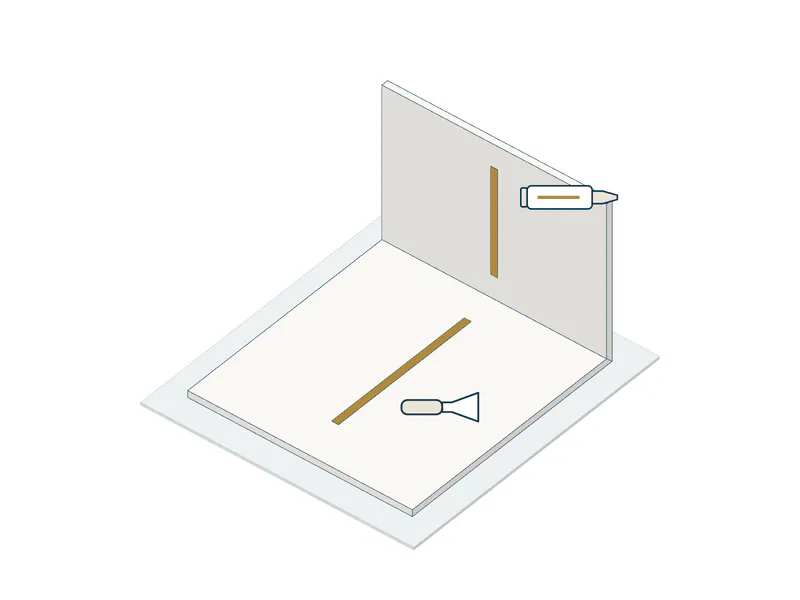
With the spatula, spread a thin layer of silicone on the side walls of the grooves in the top and the panel. Do not fill the bottom of the groove.
Step 5Insert the spine
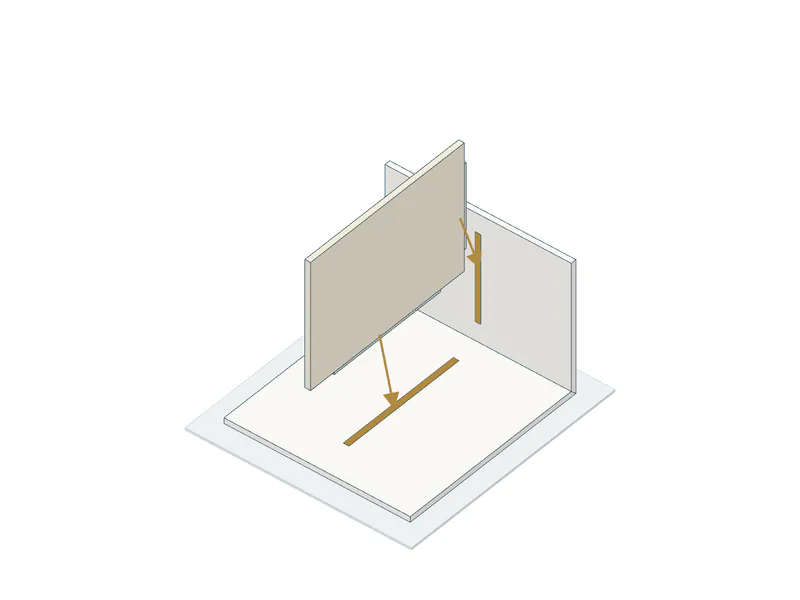
Lower the spine into both grooves at once. It slides in without force; no hammer needed.
Step 6Screw on the brackets
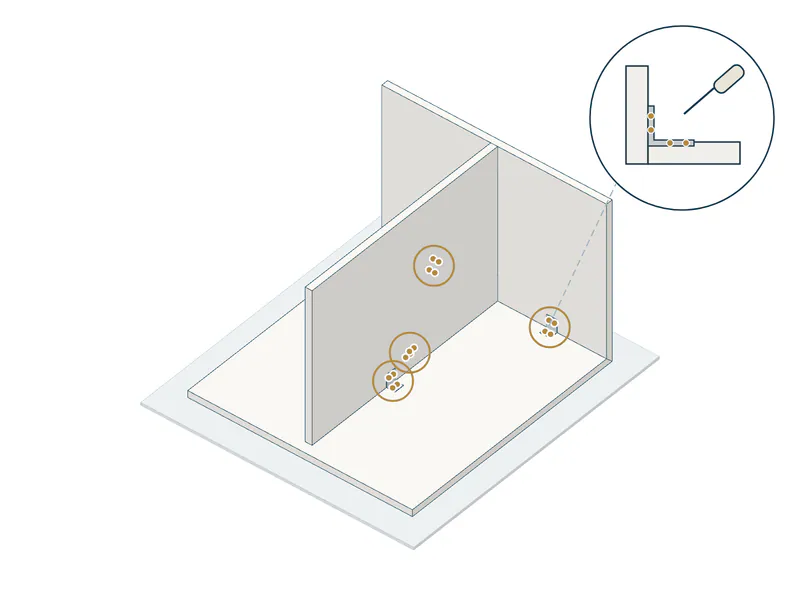
Place the brackets in their recesses: on each module, 2 on the side panel and 2 on the spine (8 brackets and 32 screws for both modules). Start the screws by hand; the slotted holes in the brackets leave play so you can line the parts up. Once everything sits right, tighten the screws gently, one after another. Do not overtighten; too much force can crack the stone.
Step 7Turn over and position
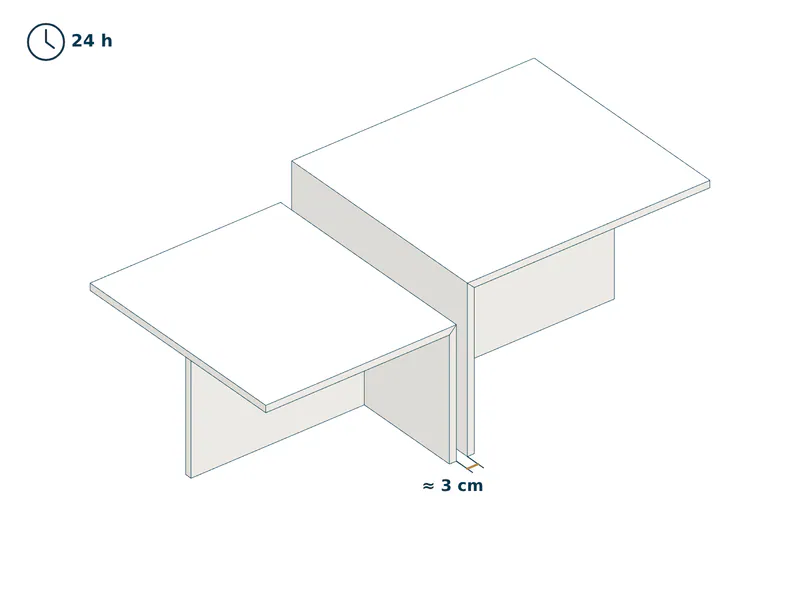
Turn it over with two people. Assemble the second module the same way, then place the two side by side, panels in the middle, about 3 cm apart. The silicone fully cures in 24 hours; avoid heavy objects on top until then.